Using the Silhouette Cameo to Create Your Own Die Cuts
Digital die-cutting machines were all the rage a few years ago. From Silhouette's to Cricut's, we were all rushing to our favorite craft store to pick up the latest in crafting technology. Being part of the paper craft industry pretty much guarantees that I'll be purchasing all the newest products (and filing them under "business expenses", of course), so I've had my Silhouette Cameo for a while.
Recently, I've been coming up with ideas that I don't seem to have metal dies for so I've been reaching for my Cameo more and more. Today, I'm going to share what I've created with you and give you a few tips for using the Cameo in your own crafting.

Turning a Picture into a Cut File // Ugly Sweater Cards
A few years ago, Kristina Werner was the queen of Silhouette. Her video tutorials were unlike any other and I can confidently say I learned a good portion of what I know from her. One of the most valuable videos I watched of her's was the one below in which she turns an image into a cut file.
You should ignore the first minute or so of the video, however, the process will be exactly the same. Instead of using a hand-written file that you create, you will be using an image you find off of Google instead. Open it in the Silhouette software as she does and follow her steps from there.
I used this same process for creating my own sweater cut file. Instead of hand-drawing a sweater, I went on to Goggle Images, searched "sweater" and came across the image to the right.
I opened the image in the Silhouette software, "traced" it, and I was left with my own personalized sweater cut file! I was so obsessed with the little sweater that I used it on two different card projects that I will share below.

Download this sweater image here.

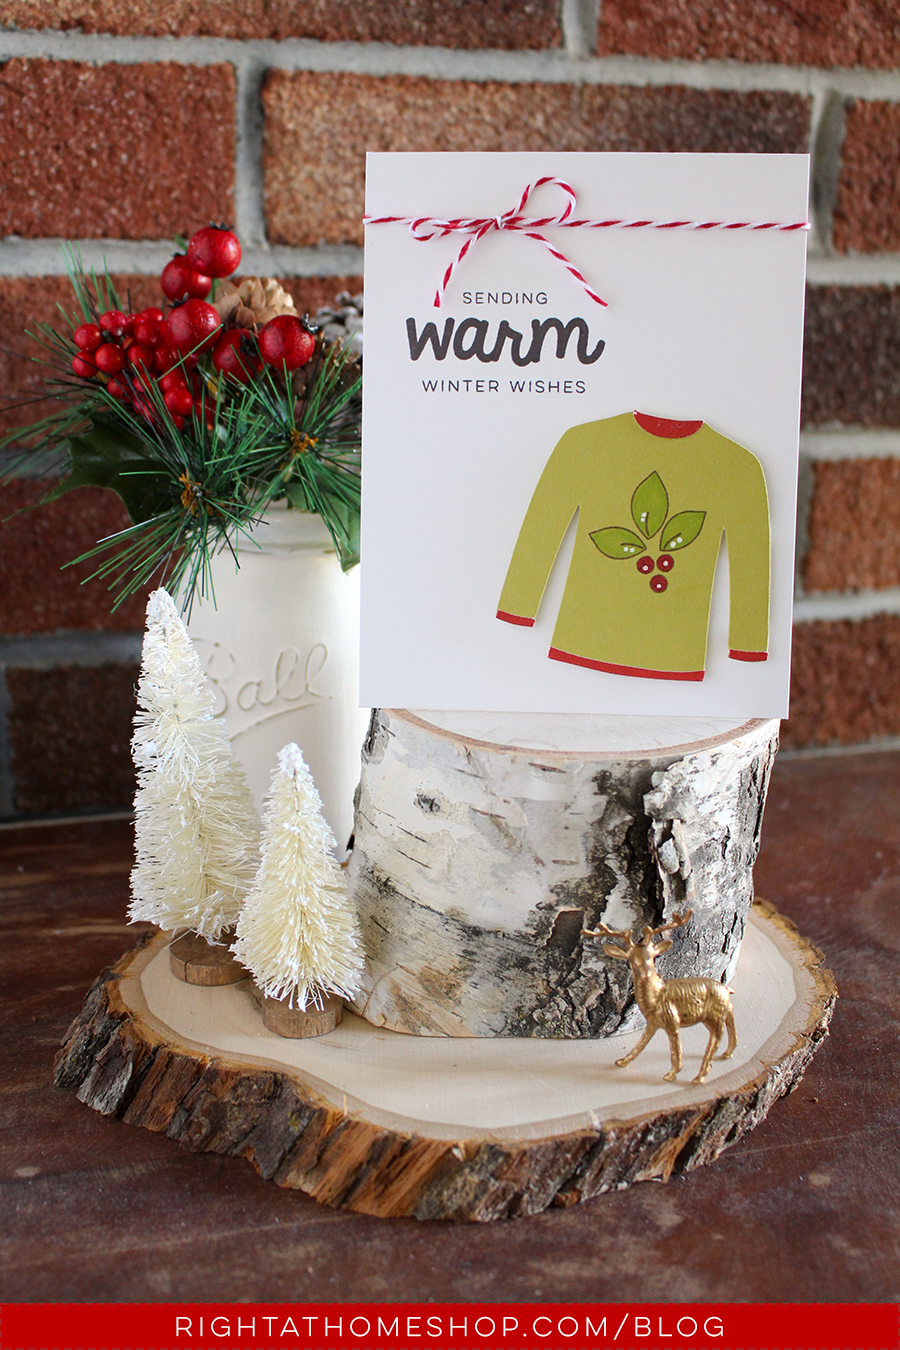
For my first card, I cut the sweater out of white cardstock and stamped various images from my Right at Home Holiday release onto it. I colored all the images in with my Copic markers and added some details with my white gel pen. The rest of the card is pretty simple since I really wanted the sweater to shine in all it's ugly / cute glory!
I kept the sweater on the second card much simpler by only stamping the holly leaves and berries from my Poinsettia stamp and coloring in with Copics. I added it to the bottom of a white card base, stamped by sentiment from my set and added some red twine. Cute & simple!
Turning a Font into a Cut File // Antler Card
One of the selling features of the Silhouette, and one of the reasons I believe it is so popular amongst scrapbookers, is the ability to cut out various words and titles using your font collection. If you are a font junkie like myself, you most likely know that some designers come up with fonts that aren't letters at all, but instead images. They call these types of fonts "dingbats" and look like the images below when typed.

Font featured: Deers. Download it here.
When you use a font like this in the Silhouette software, it automatically changes it into a cut file that can be resized and modified for your project. For my idea, I wanted to use a pair of deer antlers and the font above was the perfect match. I used the first image, which is the lowercase "y", and resized the font to fit onto a card front. I used the die cut to create the card below.
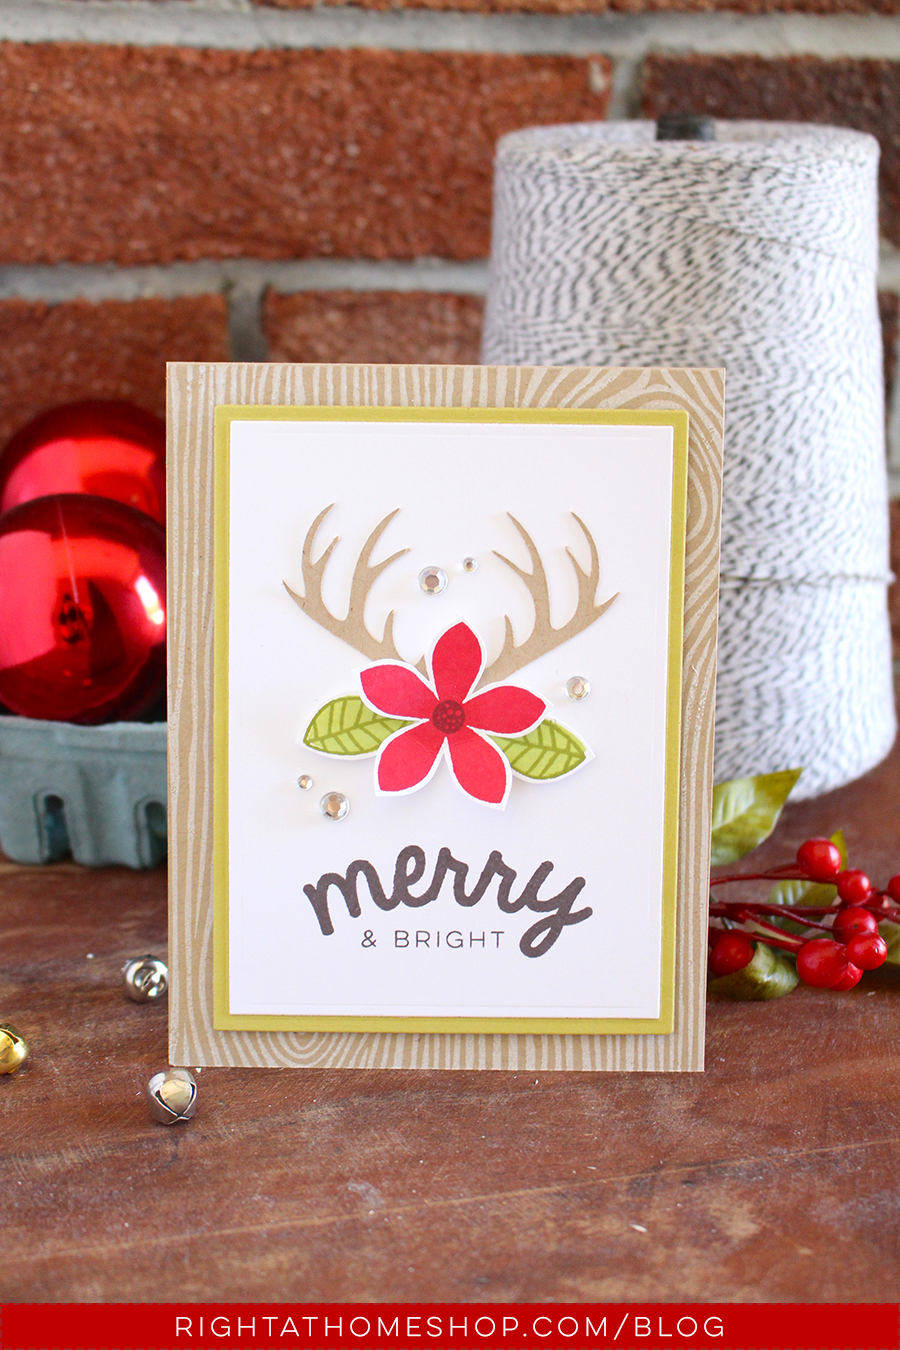
As I mentioned above, I typed the lowercase "y" to get the two antlers. I then resized them to be about 2 1/2 x 3 1/4 inches. I cut them out of kraft cardstock. For the center of the antlers I stamped the smallest poinsettia from my set and two leaves from my Fall Leaves stamp set and trimmed them out. I adhered all of these pieces to some white cardstock and stamped my greeting below it in a brown ink. I added a green layer behind it and adhered the whole piece to a kraft card base that I stamped with a woodgrain background stamp in white pigment ink.

Purchasing new metal dies frequently can become very expensive. If you've already made the investment in a digital die-cutting machine, you may want to put a little more thought into creating an image that you want on the software instead. Most of the time, you'll be able to create exactly what you want with a little creativity.
I hope you found this post useful and use the tips I shared on a future project. Make sure to let me know what you thought in the comments below!
If you are interested in the holiday stamps I used, you can find them here.
Nicole