
Using a GEL PRESS for Cardmaking!
Happy Tuesday, friend!
Welcome to the final day of our National Craft Month Celebration here on the blog and YouTube channel. I’m sad that the celebration has come to close, but I hope you’ve enjoyed all the inspiration that’s been shared.
Today I’m sharing something super fun and different for us cardmakers: using a gel press to create backgrounds!
Using a Gel Press for Cardmaking
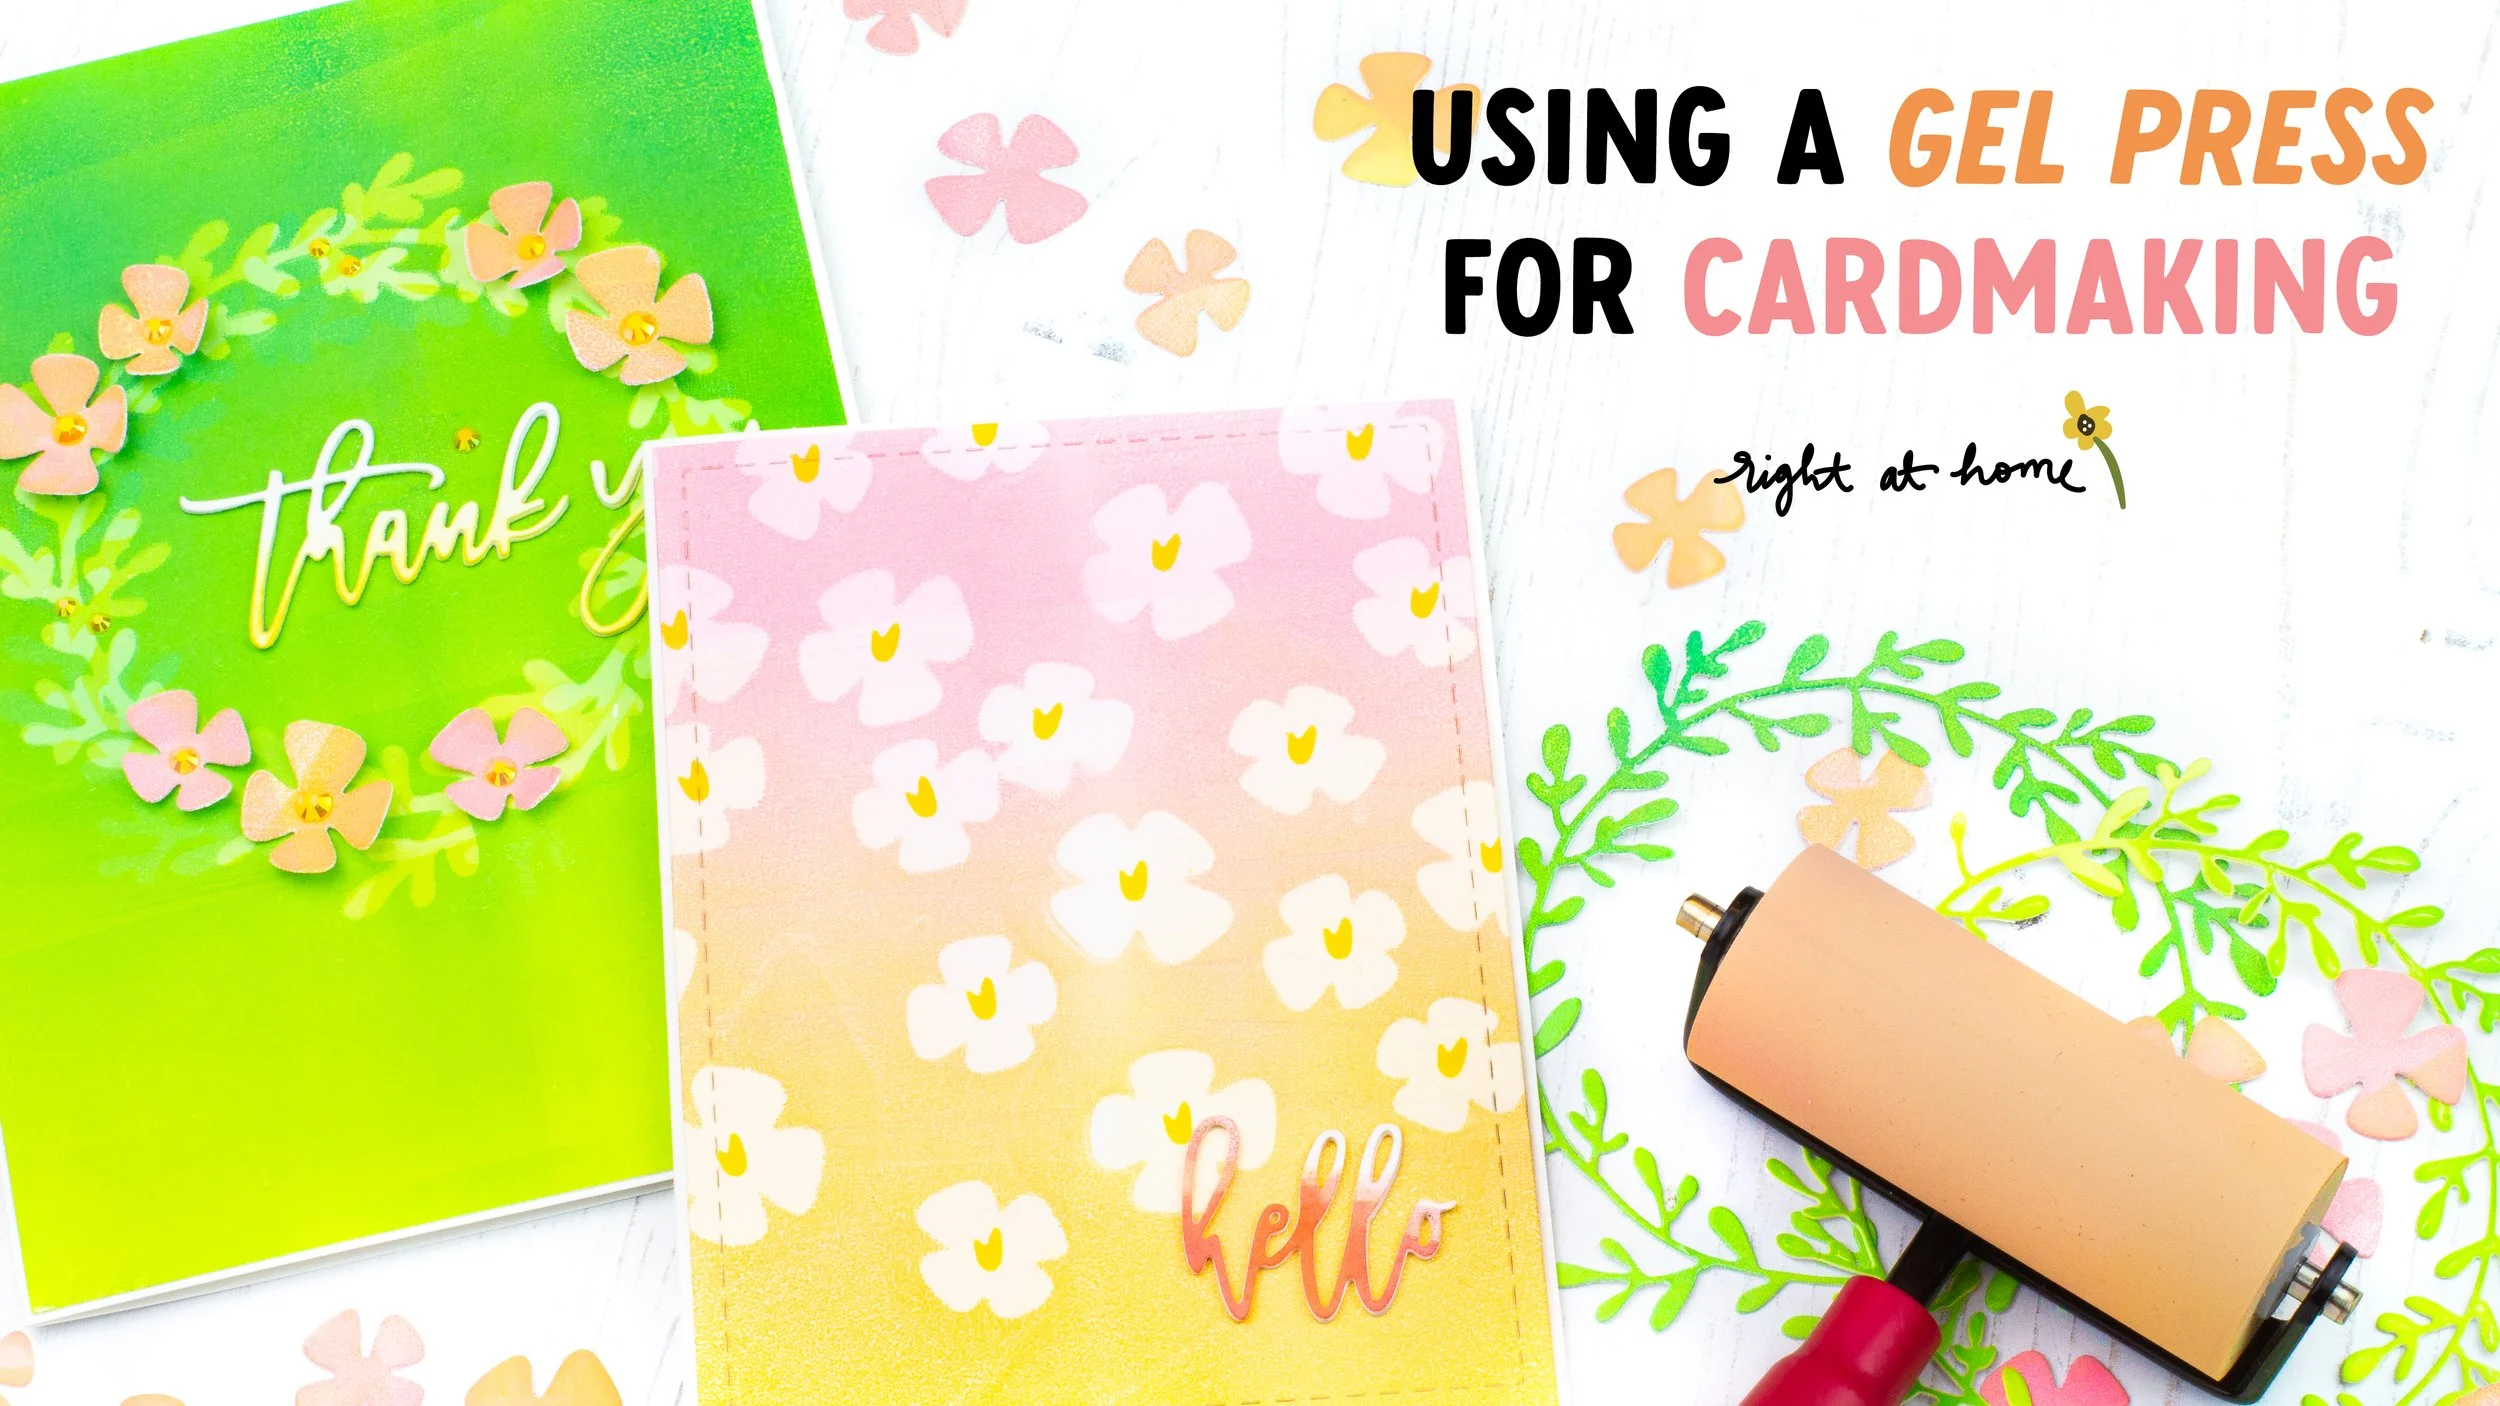
If you’ve never used a gel press before, it’s typically used by mixed media artists as a monoprinting plate. The gelli plate feels just like its name suggests! It’s super squishy, but still firm, and has a sticky surface that grips any mediums you add on top. Typically, you add acrylic paints, but I’ve seen many cardmakers use dye ink pads with one so I wanted to give it a try for myself and share the results!
Here’s a peek at some of my finished pieces:
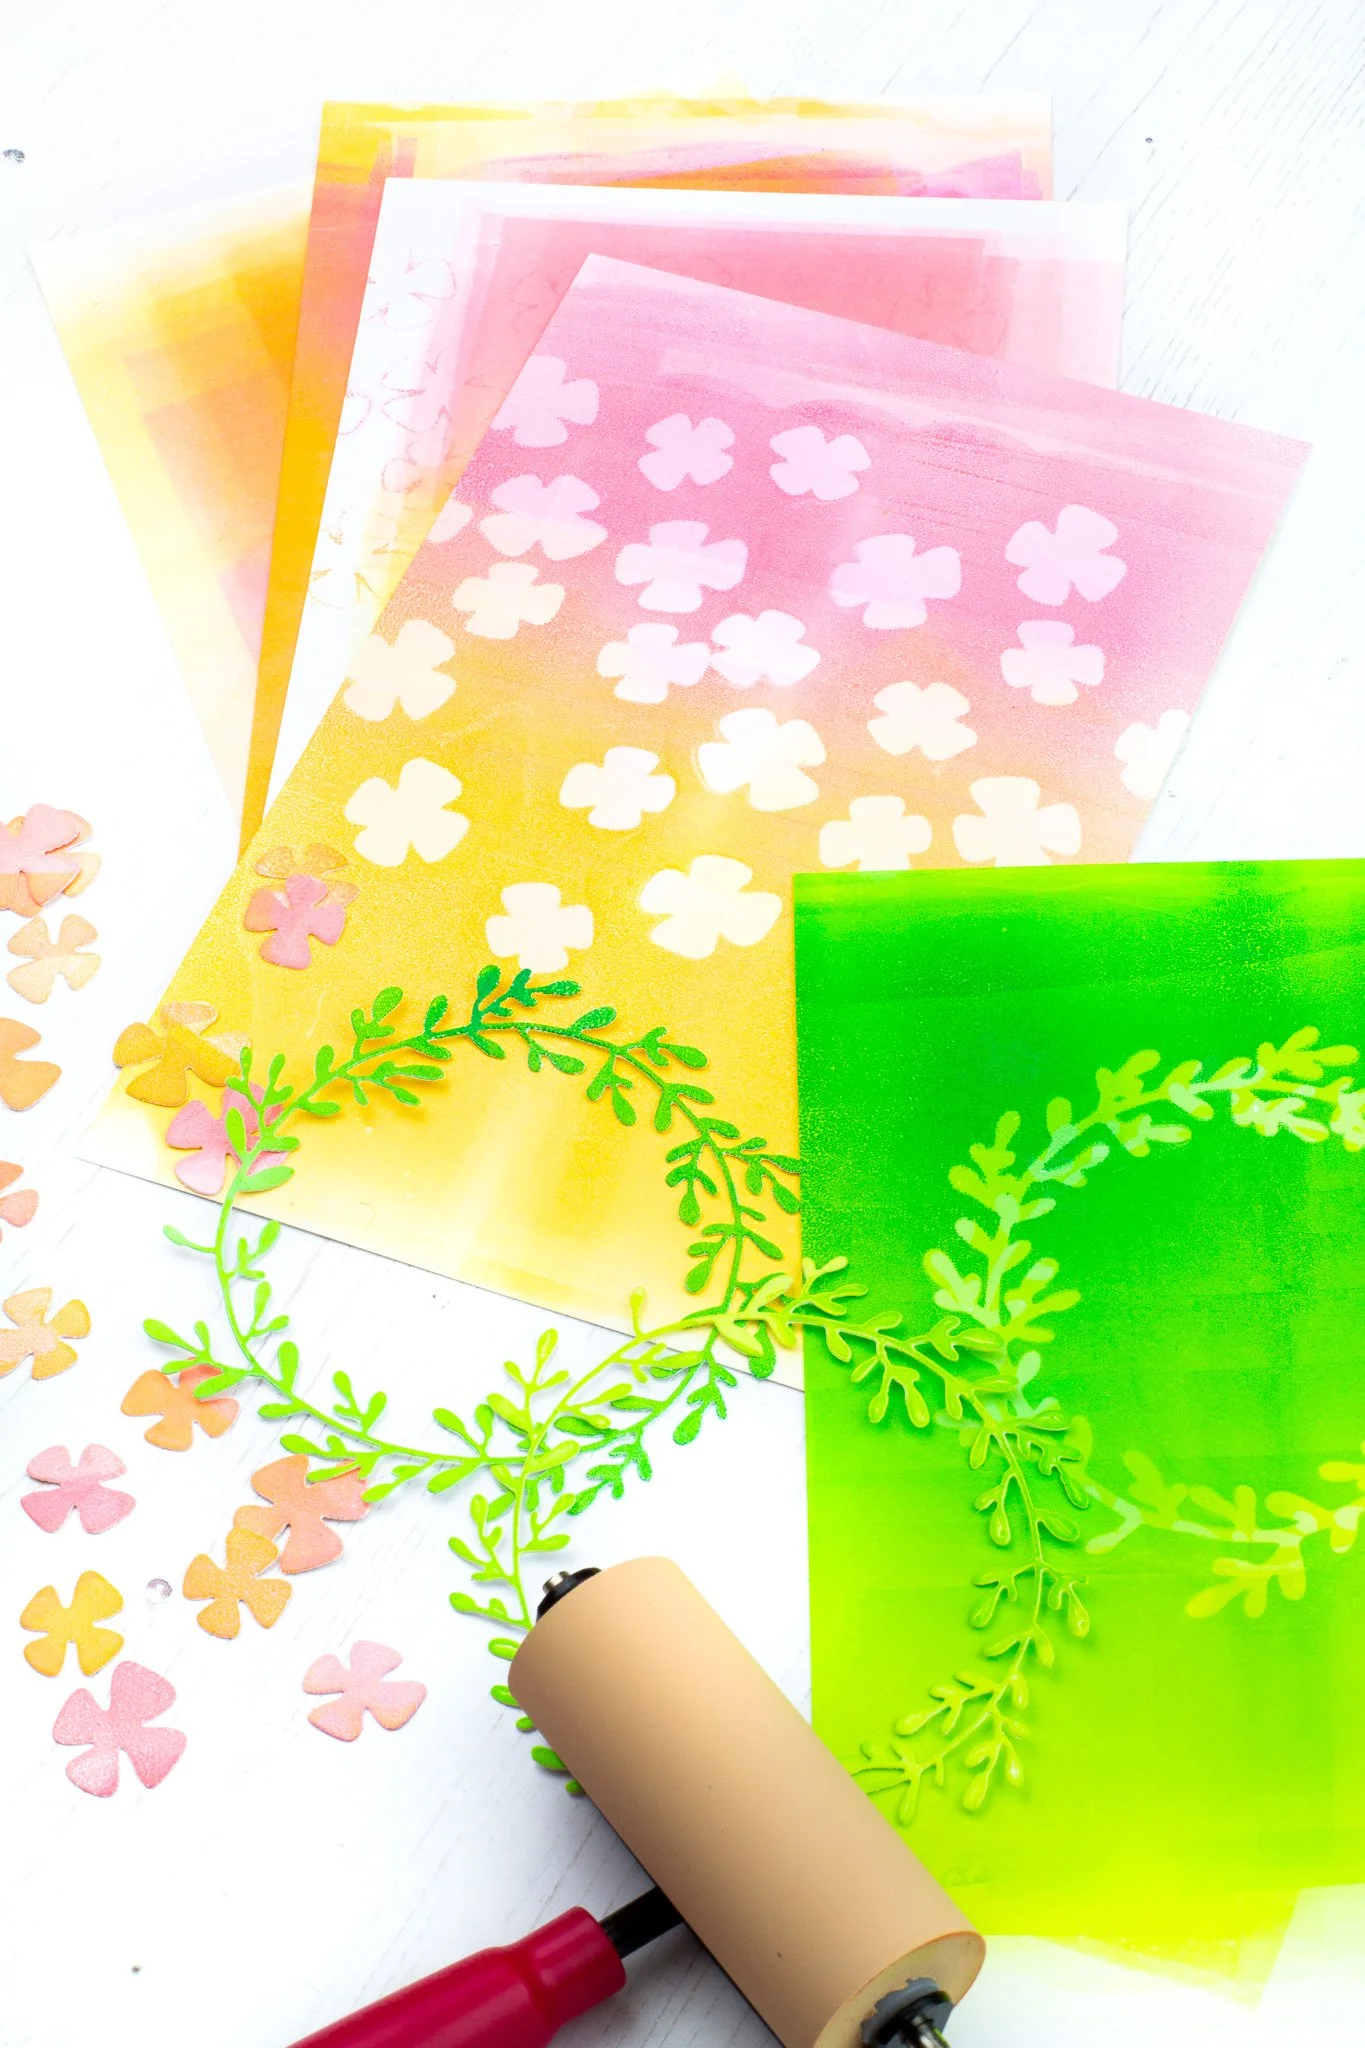
To create these, I used a brayer and rolled it onto my ink pads to pick up color and then rolled it onto my gelli plate to transfer the color. For each background I used around 2-3 shades of ink just to add more interest. Once the plate is completely covered I went in with different die cuts cut from our Seasonal Wreath Die Set (now back in stock!) and placed them down onto the plate. Over top, I added a piece of white cardstock and rolled over the back of it with my brayer to really make sure I was transferring that ink nicely. And when I lifted up the paper, this was the result!

You’ll see that once you pull off the paper, you’re left with the negative of where those die cuts were placed on the plate. The negative spot on your background will be white since no ink was transferred, by I decided to add additional layers of color on top of mine so that the negative are wasn’t as stark.
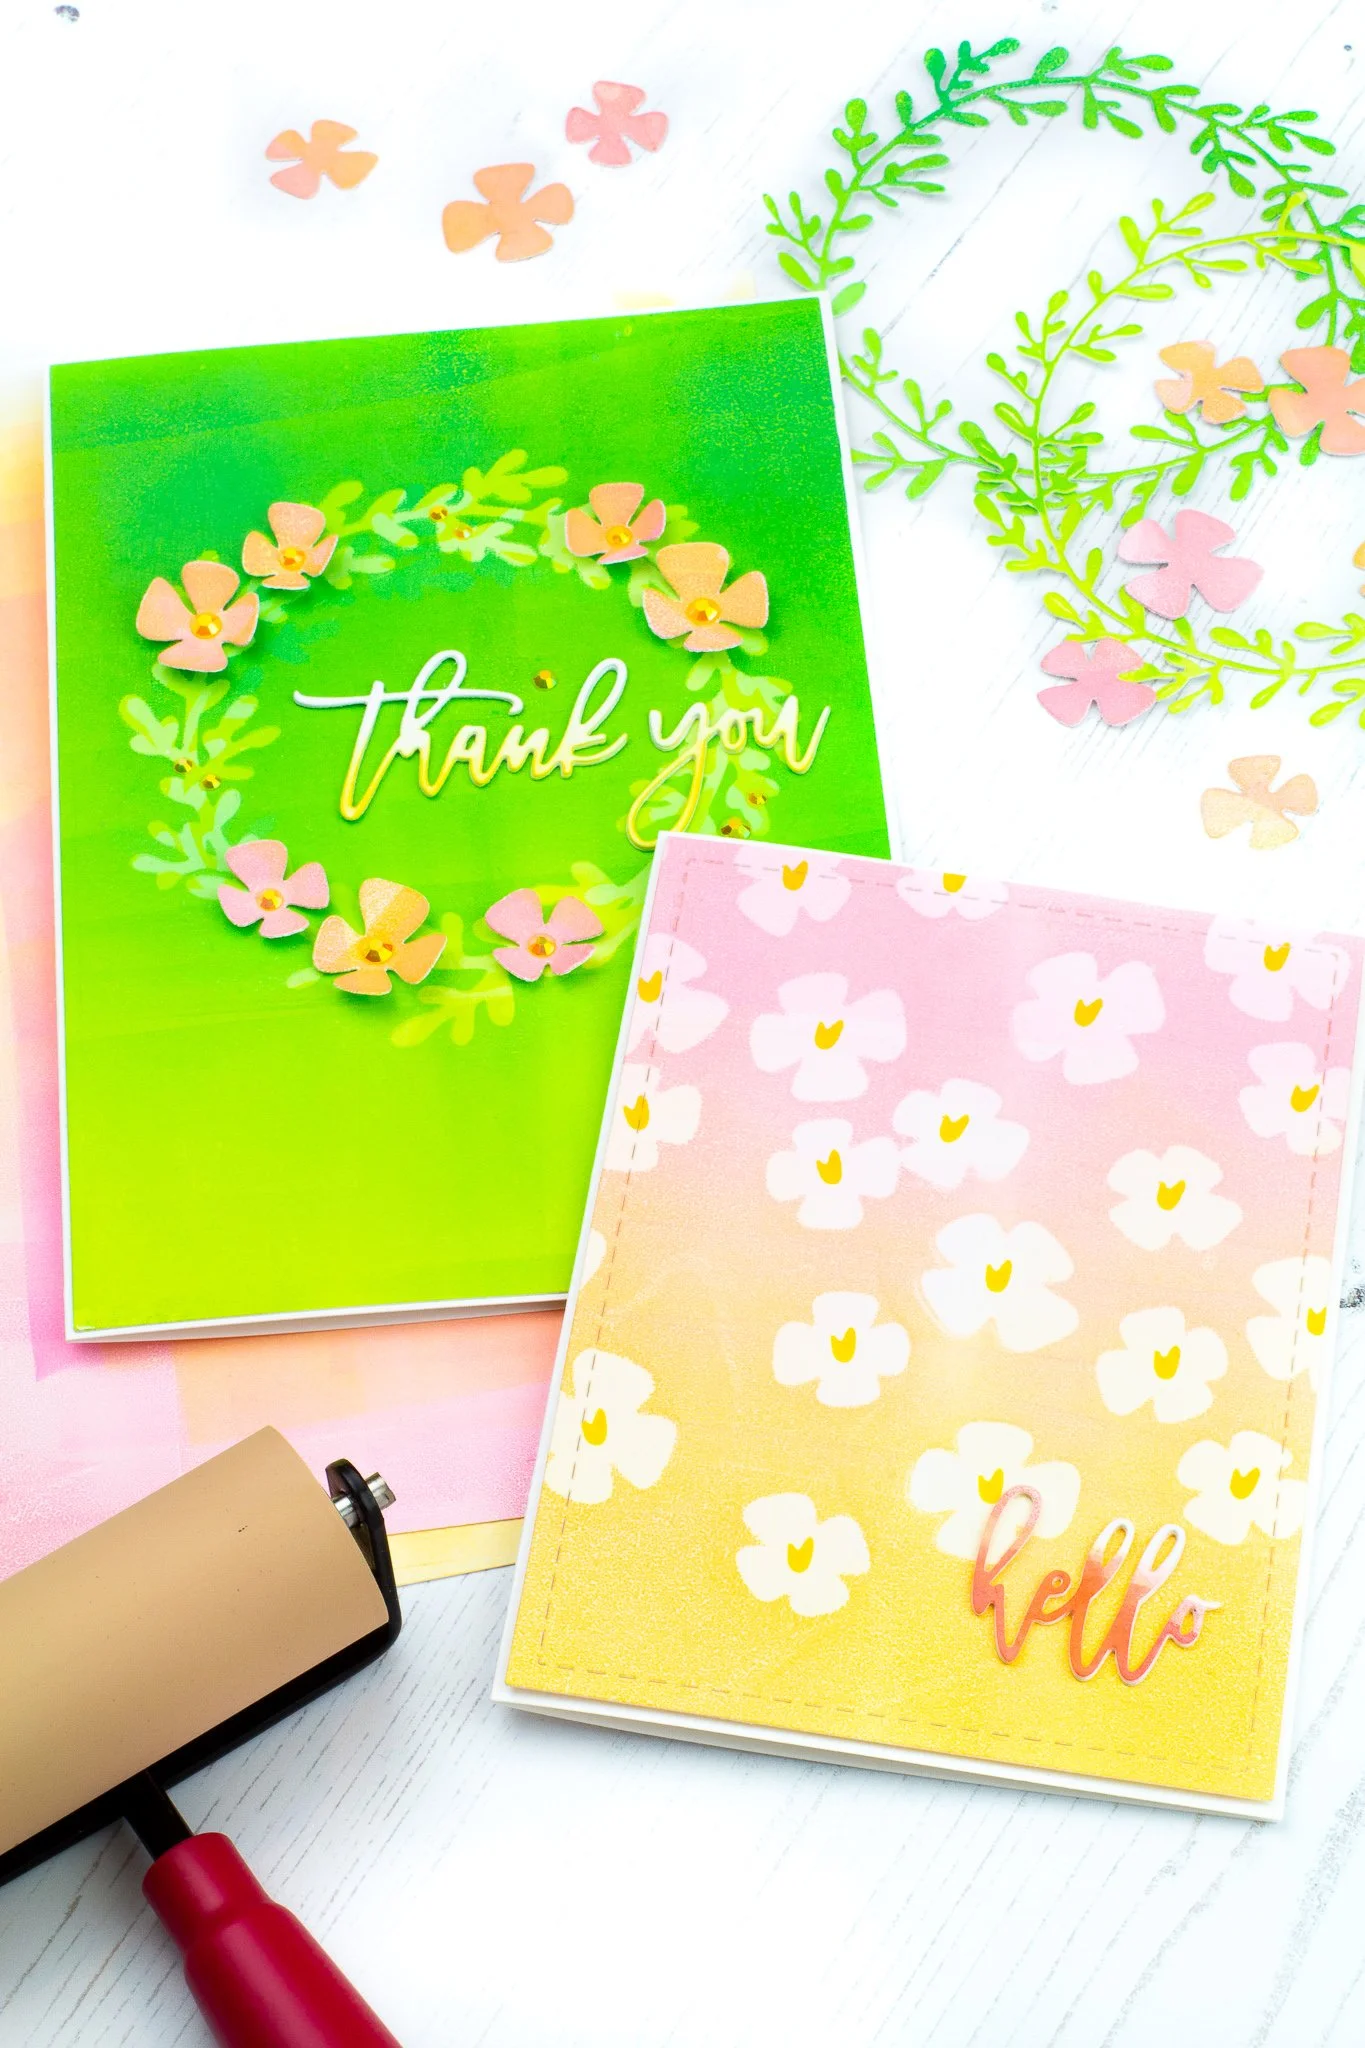
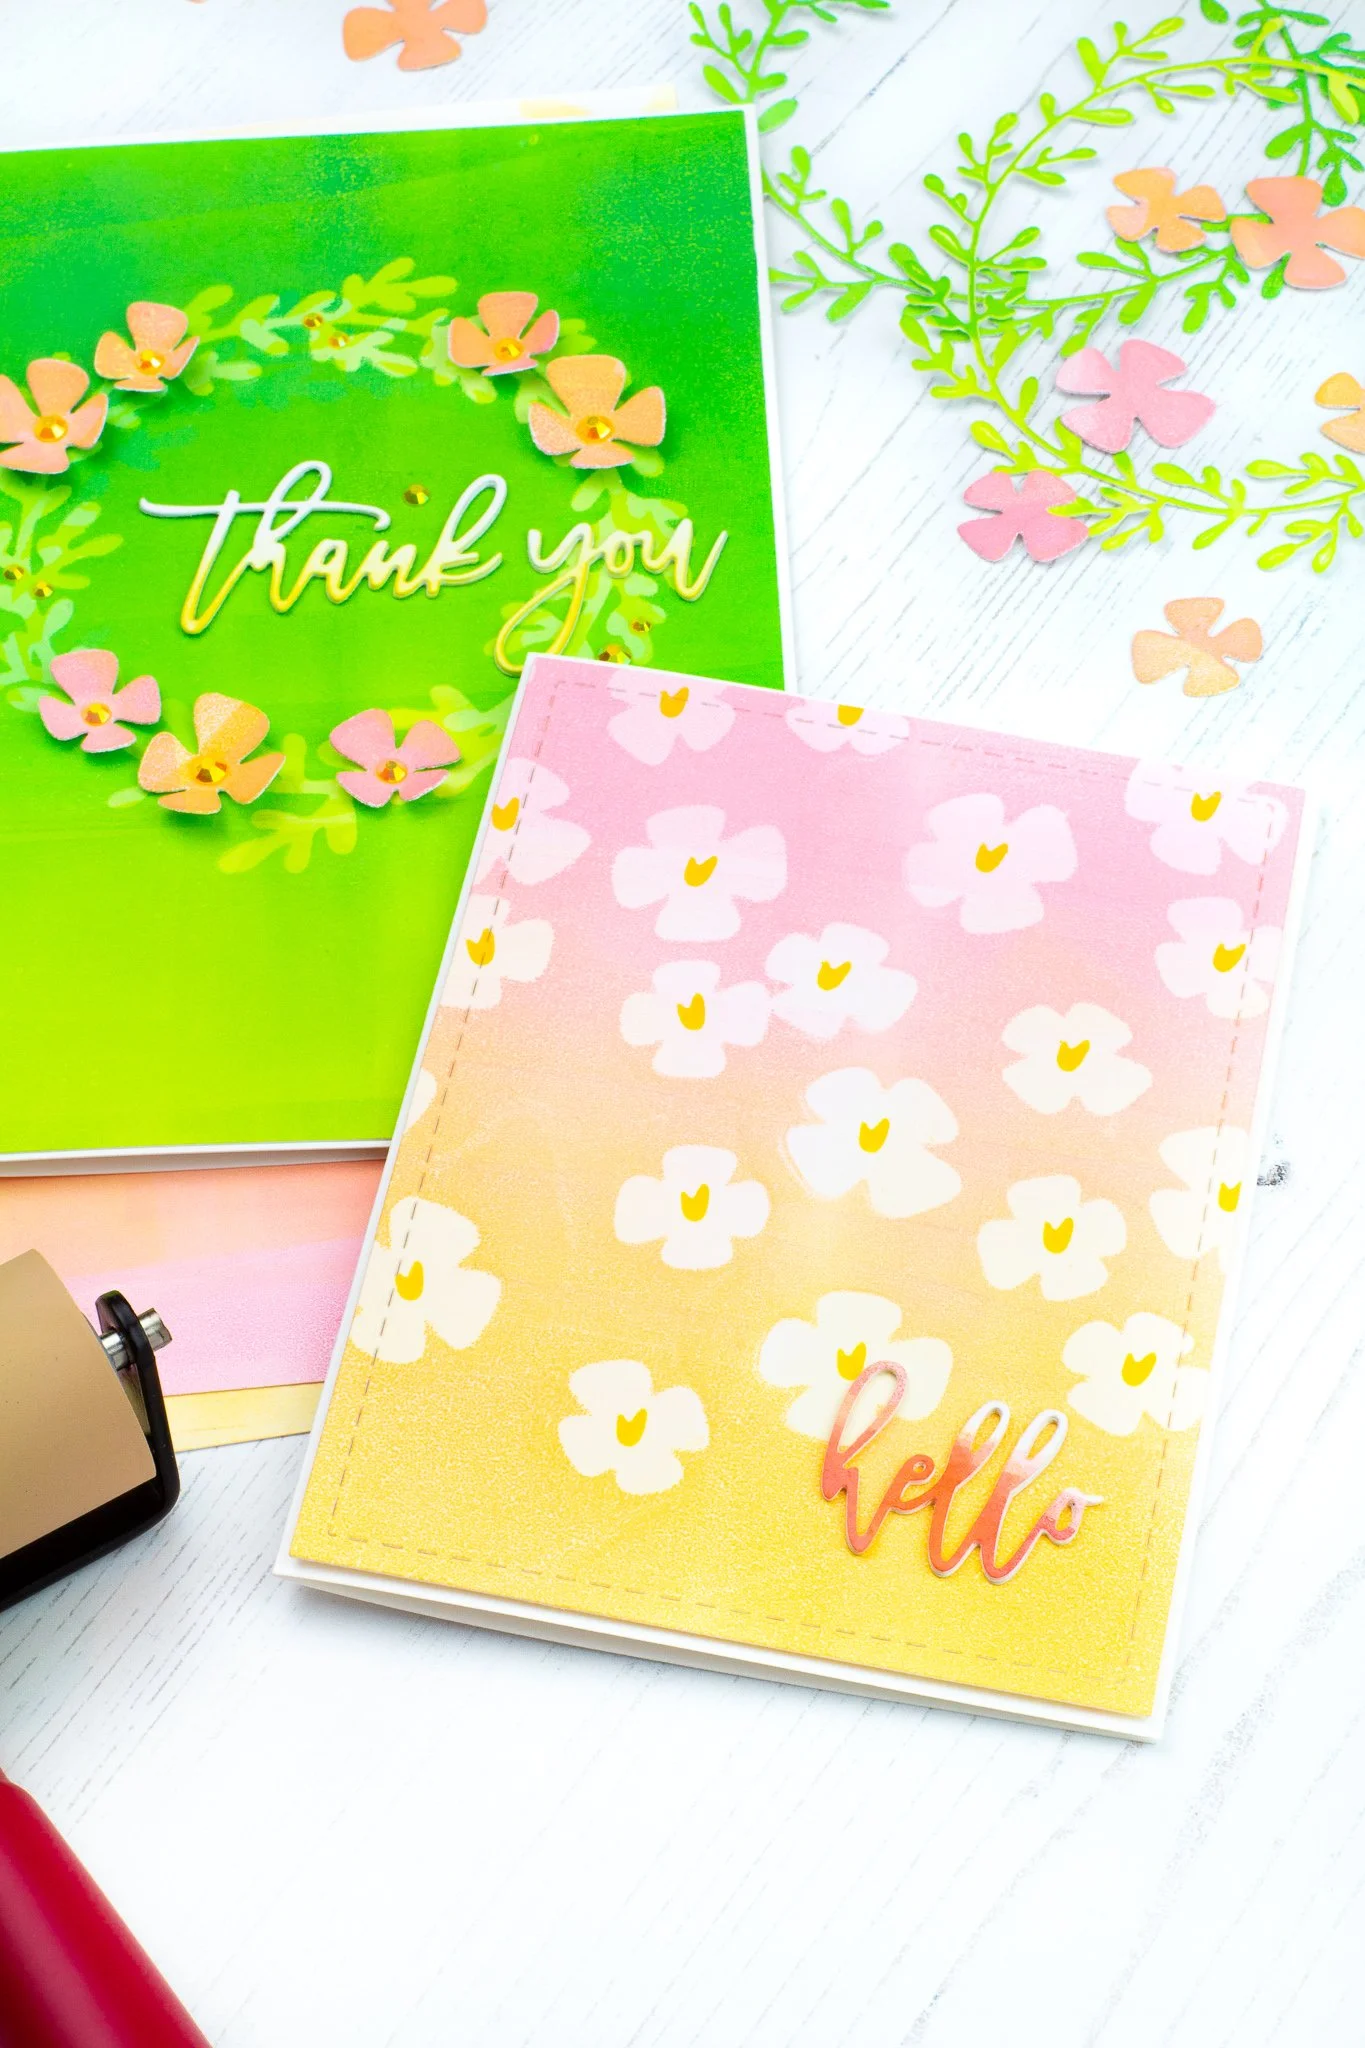
To finish off the green card, I actually pulled in the the die cuts that were used as a mask on the pink card to decorate my wreath! For the sentiment, I used the “thank you” from Script Greetings Die Set and stacked three on top of each other so it had some dimension. I also ink blended a little bit of yellow ink just onto the bottom of it as I felt leaving it just white was a bit too much contrast with the background. I added a few gems in the center of the flowers and around the card and it was finished!
You may not notice from the picture, but the green card is actually 5x7. I wanted to save as much of the background as possible!
Here are the ink colors I used for the green background: Melon Ice, Lime Rickey and Aquatini by Catherine Pooler Designs
For the pink card, I used a stitched rectangle die to trim out the section of the background I liked best. Then, to add centers to the flowers I used our Stencil Paper Pack to create my own stencil using the die set! I die-cut the tiny little bud from the stencil paper and then inked it with one of my blending tools. Our stencil paper is made from a similar material to traditional stencils, but slightly thinner so that you can die-cut it using your stand-alone die sets.
I used the “hello” from the same sentiment die set, but this time I cut it from one of my scrap pieces of cardstock that I rolled off the excess ink from my brayer on to! I loved the way this die cut looked! I popped this whole panel onto an A2 sized cardbase and my card was finished!
Here are the ink colors I used for the pink background: It’s a Girl and Tiara by Catherine Pooler Designs
If you’d like to watch the entire process of creating these backgrounds, check out the how-to video below!
Giveaway!
This giveaway has ended and the winner has been chosen and emailed. If you entered the giveaway, make sure to check your inbox for more information. Thank you so much for joining in on the celebration!
Products Used:

This stand-alone die set features an intricate wreath and additional elements to adorn it for any occasion throughout the year. Spring, fall, holiday? Seasonal Wreath has you covered!
Measurements:
Wreath: 4 in x 4 1/4 in
Bow: 1 in x 1 1/2 in
Additional elements sized proportionately to wreath
Download the Seasonal Wreath Die Set Layering Guide
Sentiments from our Be Thankful and Peace Love Joy stamp sets are sized to perfectly fit inside the opening of the wreath.
- - - - - - - - - -
Looking for inspiration specific to this product? Check out our Idea Gallery for ideas categorized by stamp set.

Coordinates with our Script Greetings stamp set.
Die-cuts each stamped word with a slight border. Also die-cuts word that can be used alone.
Measurements:
Hello: 1 5/16" x 1 1/8"
Blessed: 2 1/16" x 1 1/2"
Thank You: 3 1/4" x 1 7/16"
Celebrate: 2 3/4" x 1 1/8"
Outer bubbles: 3/16" larger than inner die measurements
- - - - - - - - - -
Looking for inspiration specific to this product? Check out our Idea Gallery for ideas categorized by stamp set.

Create your own stencils using our Stencil Paper Pack! Simply die-cut your stand-alone dies from the material and use with your ink blending brushes to create stenciled backgrounds.
Features
(8) 6x6 sheets
7.5 mil
Easily die-cuts and wipes clean for repeated use